

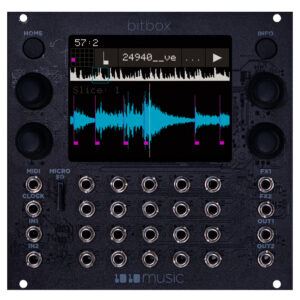
Black Faceplate for Bitbox
$29.95
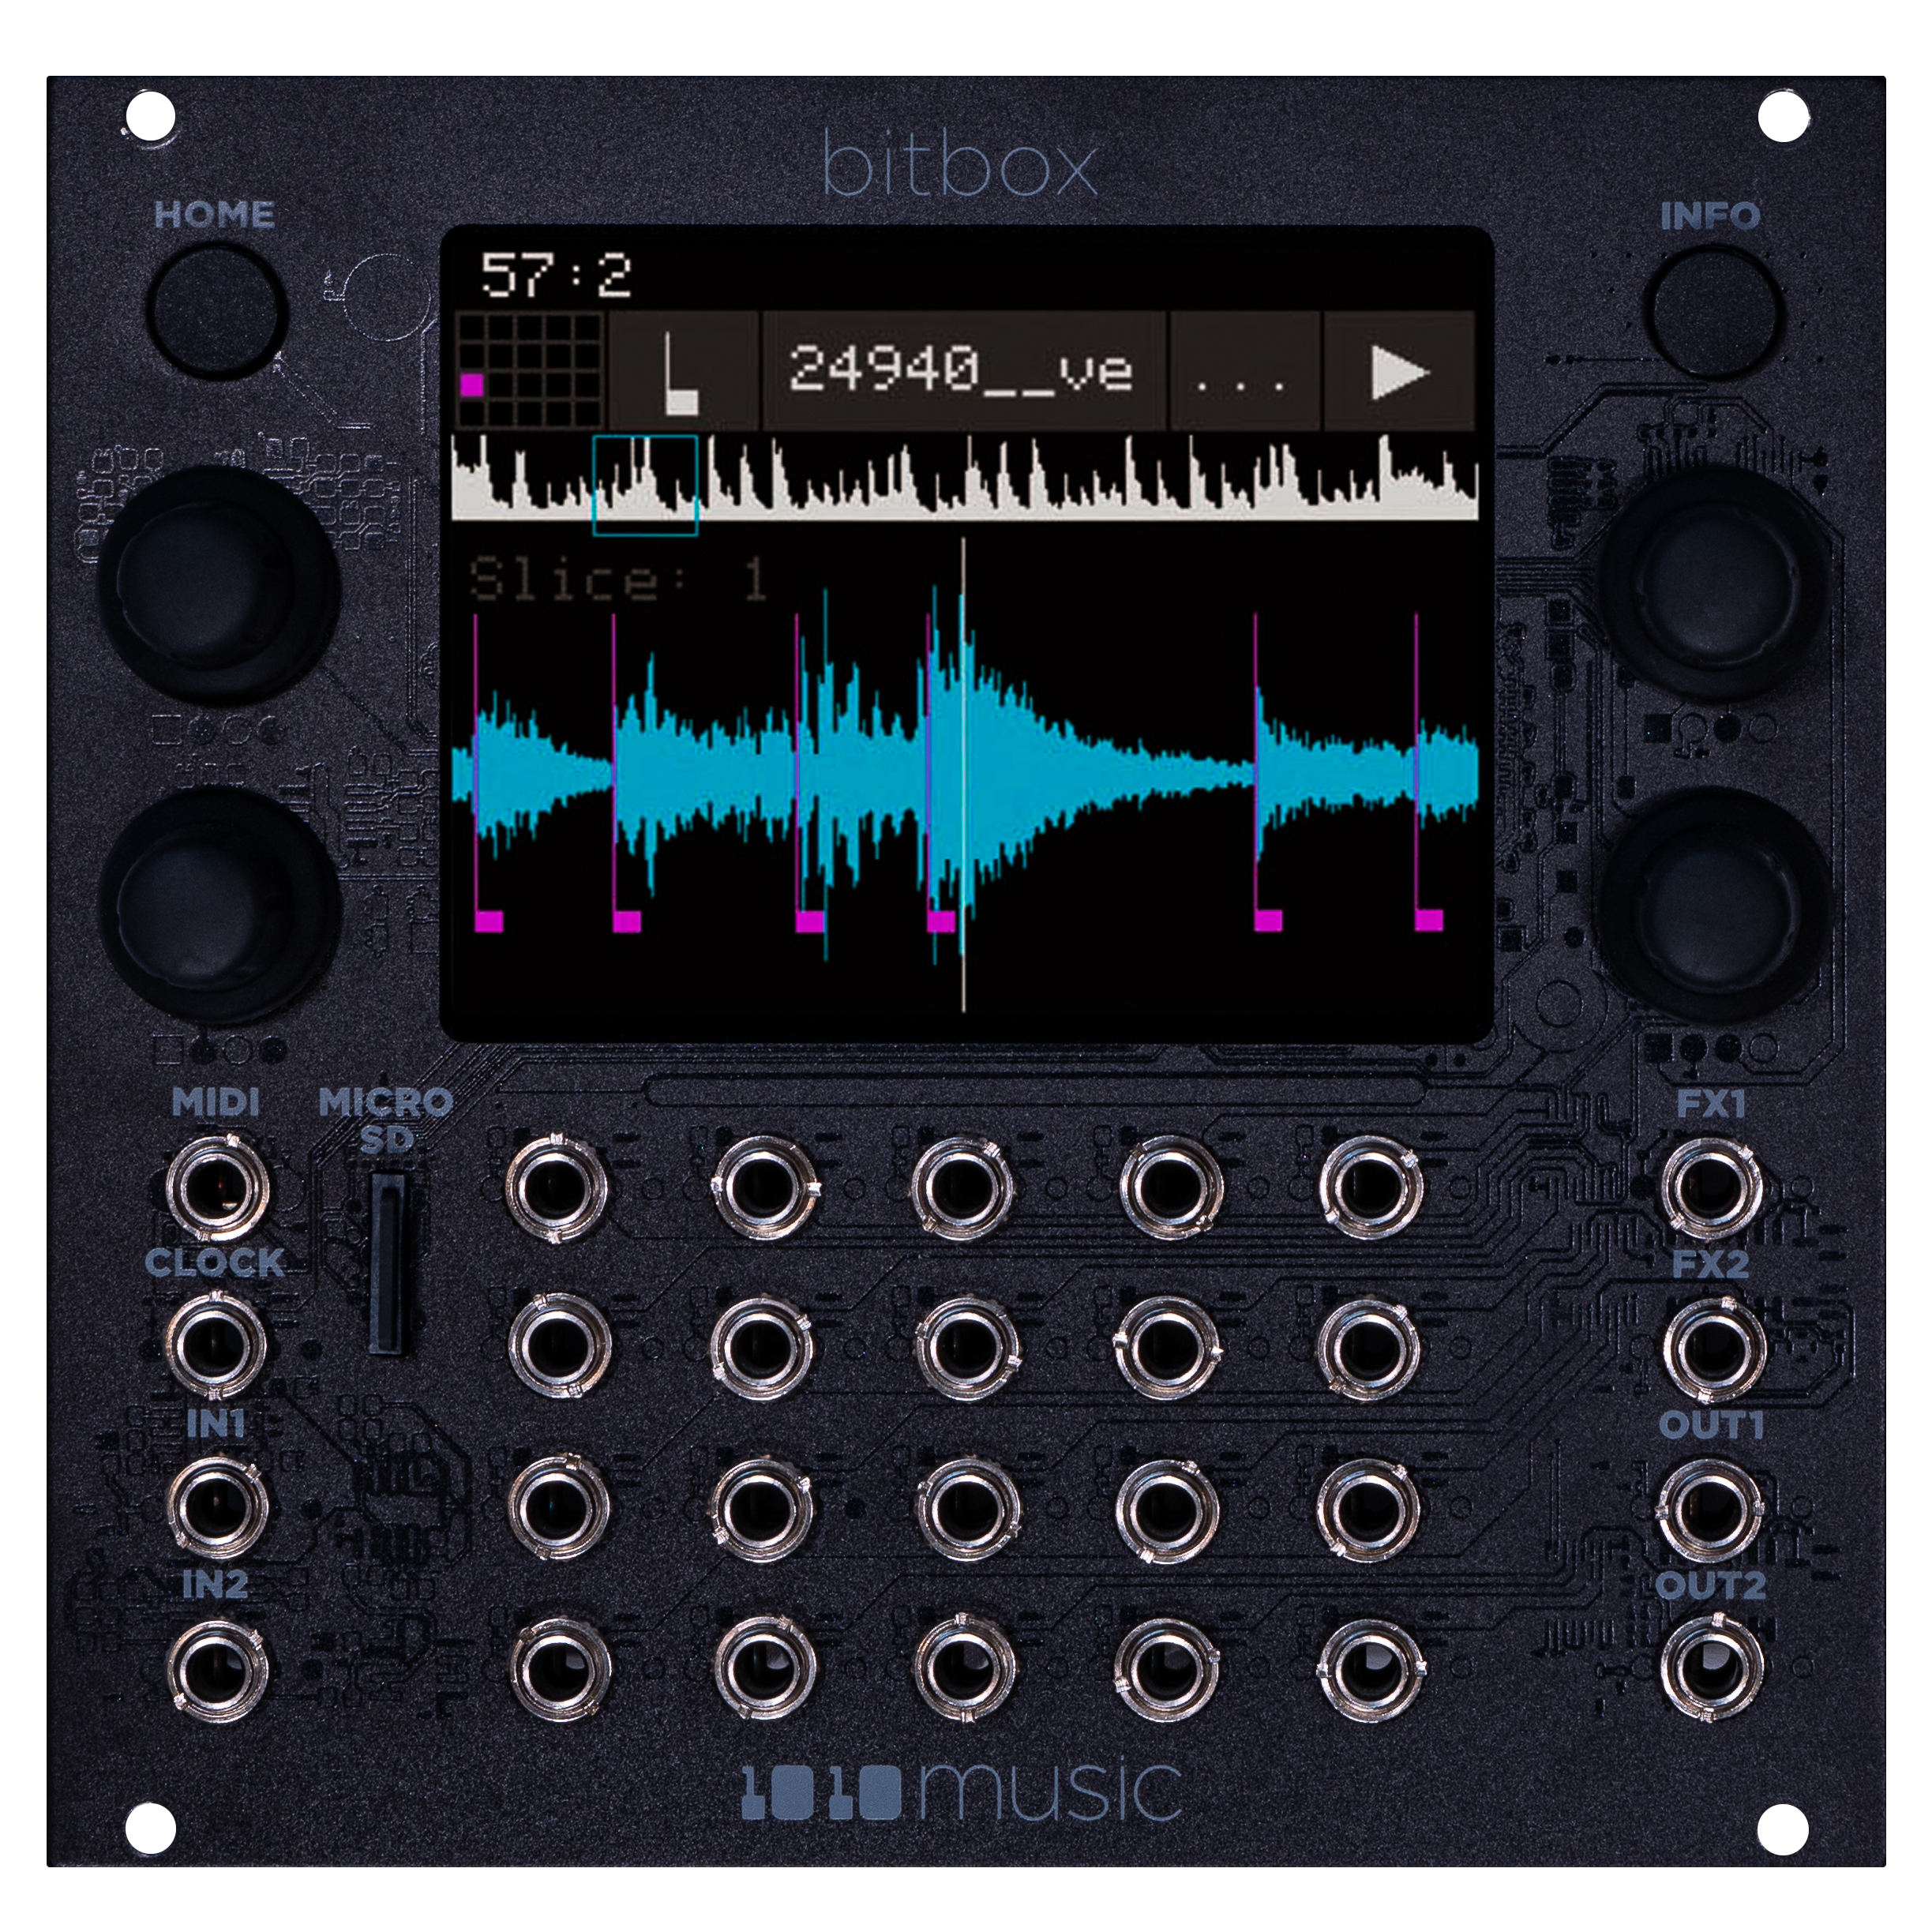
You asked for it! You can now update your bitbox mk1 or mk2 with a black faceplate. Add digital sampling capabilities to your all black rig. This is JUST the faceplate.
In stock
---- Dealer Portal ----
$29.95
You asked for it! You can now update your bitbox mk1 or mk2 with a black faceplate. Add digital sampling capabilities to your all black rig. This is JUST the faceplate.
In stock